Step 7: Production Hardware & Programming
The laptop-hosted National Instruments NI USB-6001 is great for system identification and candidate controller design prototyping. A production solution requires an industrial-grade controller with minimal interfaces for simple, reliable operation.
Platform: Automation Direct P1AM-100
Below is a rendering of an Automation Direct P1AM-100 Arduino platform main controller with peripheral modules. This is not the module combination used for the rewinder edge controller but the figure suffices as a form factor reference.
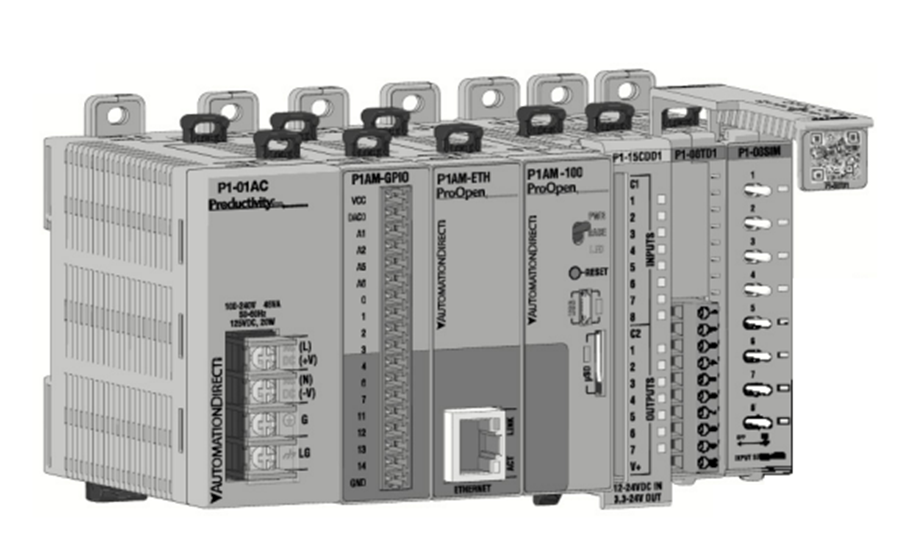
| Automation Direct Module | Description | Configuration |
| 24V DC Power | 110V input | DIN rail power supply |
| P1AM-100 | Arduino-based CPU | 10ms Timer Interrupt control loop |
| P104-AD | 16-bit A-to-D | Channel 1: 0-10V LVDT input Channel 2: -10 to +10 Edge Guide sensor input Channel 3: 0-10V Gain scale potentiometer input |
| P1-04DAL-2 | 12-bit D-to-A | Channel 1: 10V constant bias output to gain pot Channel 2: 0-10V valve amp command output. |
| P1-02HSC | Counter-Timer module | Channel 1A: Idler revolution pulse input |
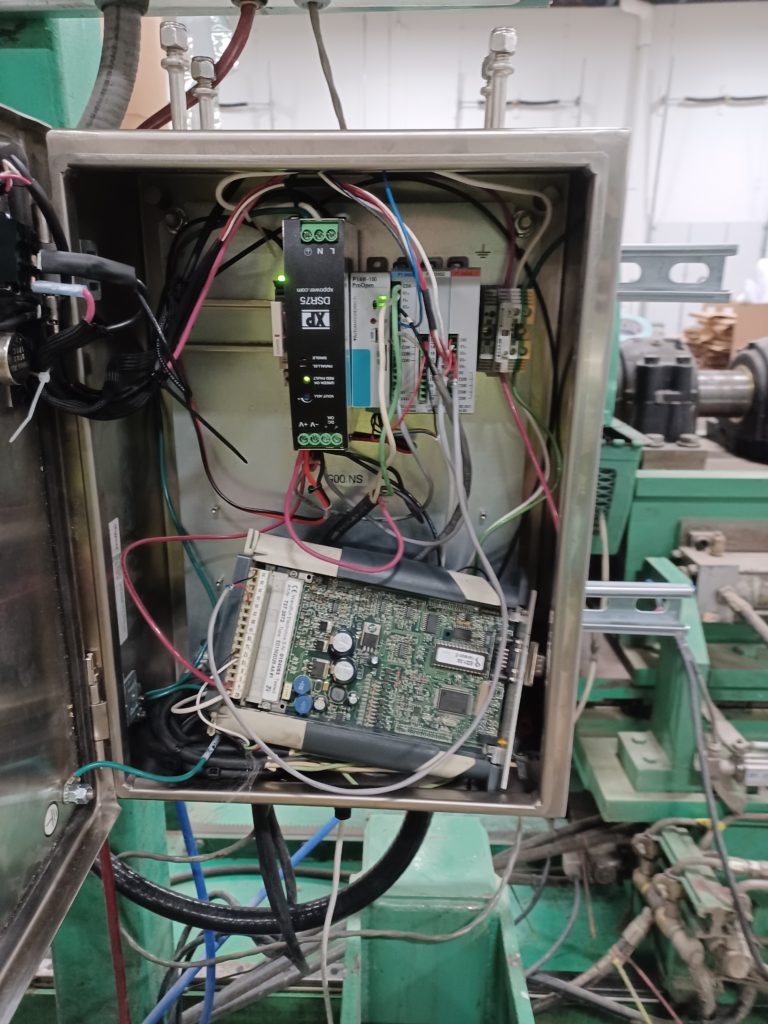
Installed, with hydraulic servo valve amplifier resting in the box
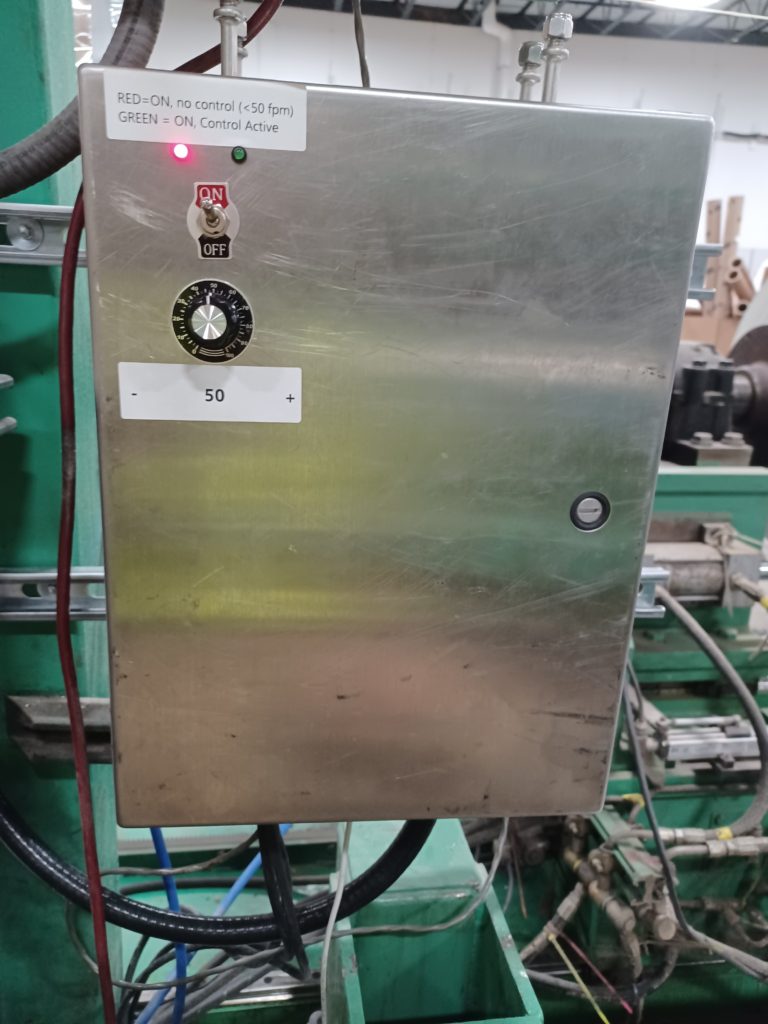
Usability is a critical design consideration for any production system. Here we see a simple on-off switch and a gain scaling knob, although the latter should not be needed. Nominal gain setting of 50 (middle) maintains the design gain that is scaled by speed as described.
The knob can turn to the limits of halving or doubling the nominal design gain should a need arise for slight tuning. Production testing indicates this is likely not needed.
Simple User Interface (Hold/Job Mode Pendant Not Shown)
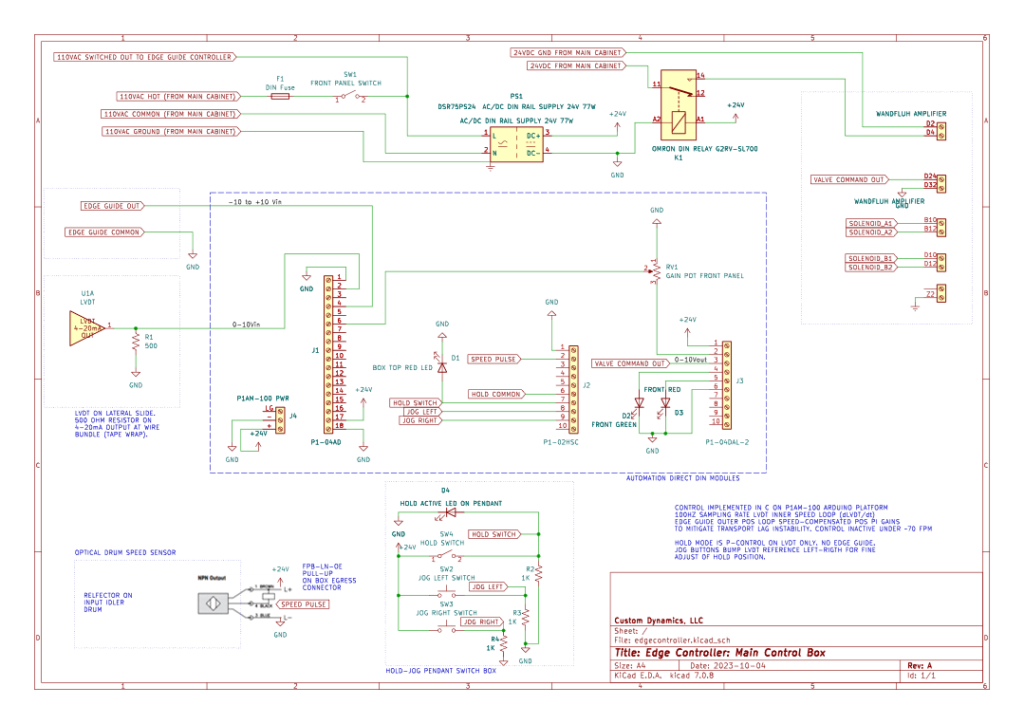
Control Box Schematic
The schematic below is a wiring diagram for the edge control cabinet. The large dotted box represents the Automation Direct DIN-rail modules. Other sub-systems are bounded by the other dotted boxes.
Software
The P1AM-100 is an Arduino-based controller. The edge position controller is implemented in C within a 100 Hz timer interrupt for a sampling interval of 10ms.
Arduino reference material explains how user-space code is presented a “setup()” and a “loop()” Arduino callback function.
Within “setup()” we configure the peripherals, initialize data, and enable the 10ms timer. The 10ms timer interrupt service routine accomplishes a hard real-time controller implementation. The “loop()” function is a low-priority callback from the Arduino operating system. We add a 1 second delay at the end of each loop to produce a nominal 1-Hz service loop.
The service loop performs log and monitoring tasks outside of the control loop.
Project Source Code
https://github.com/cusdyn/rewinder